Last Updated on September 16, 2021
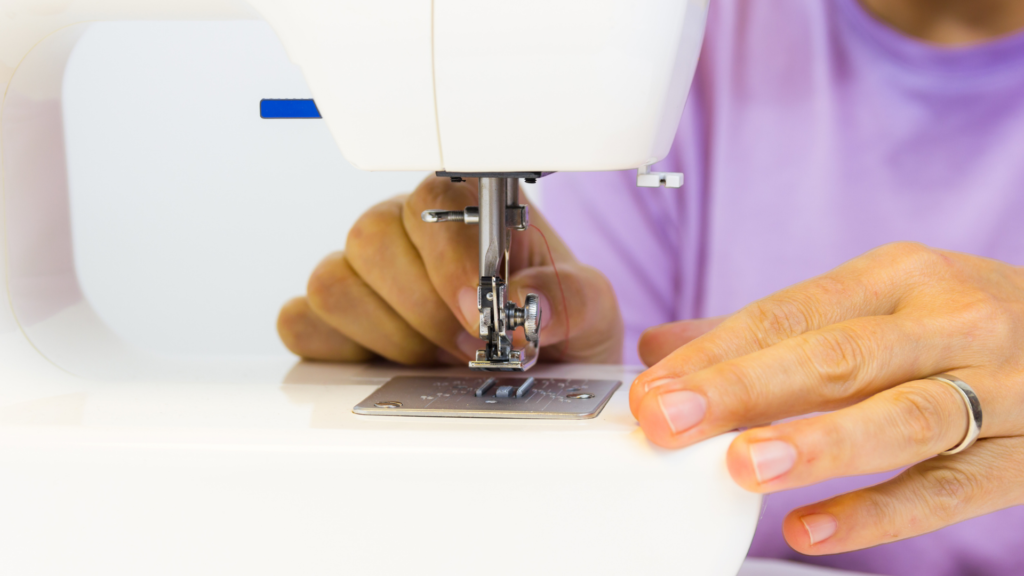
When it’s tension time, and you’re stressed because you can’t get the sewing machine tension just right, here’s a guide to get you started. This guide will show you how easy it is to adjust sewing machine tension, even for beginners.
How to adjust sewing machine tension? The three general procedures are first, set up your sewing machine. Then, adjust your tension knob, and do a series of seam tests.
When stitches are not correct, quilters are sometimes hesitant to adjust sewing machine tension. The incorrect modifications will make the problem worse but don’t worry. This guide will show you how to adjust your sewing machine’s tension like a pro.
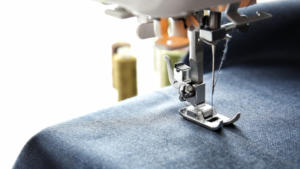
Adjusting Sewing Machine Tension
Many sewers avoid adjusting the tension settings, believing that doing so will only make things worse. In truth, regardless of the make or model of your sewing machine, there’s nothing strange about setting and altering thread tensions. What’s more perplexing is that many ostensibly tension-related issues can start with things other than misaligned tension dials.
There are two sorts of tension adjustments. The basic adjustment for everyday sewing, which your repair person will do, but you can do it yourself. The temporary adjustment is required when changing thread types or sizes, fabrics, or stitching processes.
Basic Adjustment
- Select contrasting thread colors in the brand, size, and fiber to make a basic modification.
- Fill the bobbin with one color and set the machine to medium speed to avoid stretching the thread.
- Thread the machine with a new needle in the size you use most often. But skip the eye on the bobbin-case finger if your machine has that function.
- Set the stitch length to 2 mm (12 stitches per inch) or whichever length you’ll be using the most.
- Set the upper-tension regulator to the middle range (usually 4 or 5 on most machines). Then sew a test seam on two layers of lightweight muslin, then inspect the stitches. Use a magnifying glass if necessary to view the stitches.
- If the tension isn’t just correct, tighten the bobbin spring if the bobbin thread is visible on the top layer. Loosen it if the needle thread is visible on the bottom layer.
- Repeat until the stitch is balanced, then make another test seam and examine the stitches.
- Start a tension journal in your sewing machine manual after your stitching is balanced. Note the thread brand, size, type, and the number on the upper-tension regulator that generated a flat stitch.
- Draw a drawing of the bobbin screw’s position to use as a reference. You may need this if you need to record a change in bobbin settings for particular threads.
Temporary Tension Adjustment
- The first step is to select the threads for the needle and bobbin.
- Fill the bobbin and thread the machine to create a temporary tension adjustment. Make a test seam on the cloth you’ll be sewing, inspect the stitches. See if you can strike a balance with just the upper-tension assembly.
- Every time you go from one sewing thread to another, thread your sewing machine first. Test your setup to determine if you can get away with a temporary tension adjustment using only the tension dial. If it doesn’t work, take out the second bobbin case and begin loosening or tightening the screw in quarter-turns, as your sample indicates.
- The tensions may be both lighter. When using a lighter-than-normal thread for both needle and bobbin, the tensions will usually stay balanced. This is often all that’s required to keep lightweight textiles from puckering, so no adjustments are required.
- Both tensions will increase by using a heavier thread at the top and bottom. You’ll probably need to set a lower tension to accommodate heavier textiles.
How Do You Decrease Or Increase Your Tension
How To Adjust Top Tension
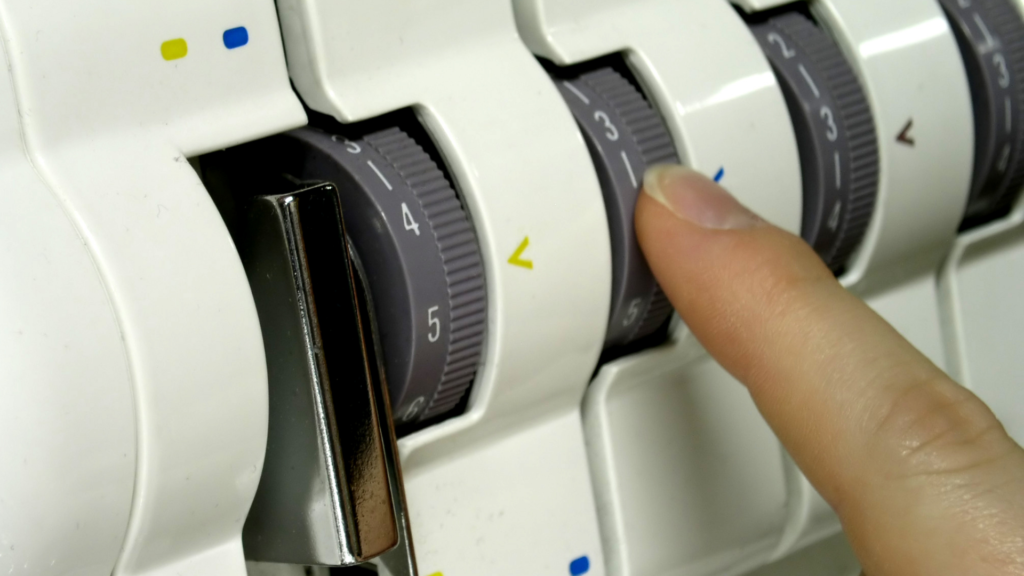
- Locate your tension adjusting dial. Every machine will have it in a different location. If you’re not sure where it is, consult your sewing machine handbook.
- If you don’t have a manual, it’ll be the knob with the numbers that don’t change the stitch type or length.
If Your Top Tension Is Too Loose
- Turn your knob for the ascending to increase top tension (if your top tension is loose).
- Lower the number by half a number.
- Test on a light scrap piece of cloth with a different color thread on top and bottom. Please do not stop until it looks even on both sides and the bottom thread is no longer visible on the top.
- If you are having trouble, leave it where it’s closest to balanced and change your bobbin tension.
If Your Top Tension Is Too Tight
- Turn your knob to lower the numbers to lessen your top tension (if your top tension is too tight).
- Lower the number by half a number.
- Test on a light scrap piece of cloth with a different color thread on top and bottom.
- Please do not stop until it looks even on both sides and the bottom thread is no longer visible on the top.
- If you’re having trouble, leave it where it’s closest to balanced and change your bobbin tension.
How To Adjust Your Bobbin Tension
If possible, try to adjust your top tension first. Unless you’re using a thicker or lighter thread than usual, you shouldn’t need to adjust your bobbin tension.
- You may need more tension for heavier fabrics (set the dial to a higher number).
- You may need less tension for lighter fabrics (turn the dial to a lower number) (turn the dial to a lower number). Too many modifications to the bobbin’s screw may cause it to loosen its grip.
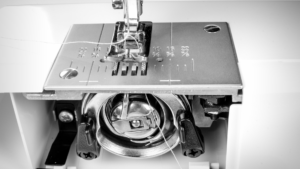
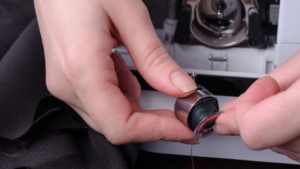
- You will find a top-loading drop-in bobbin or a bottom-loading bobbin with a bobbin case. You may adjust the tension by tightening or loosening the bobbin case screw.

Things You Need To Remember When Adjusting The Tension
Tension Devices And Proper Threading
Without adequate threading, you won’t be able to get proper tension. The four tension mechanisms are thread guides, tension discs, tension regulator for upper thread, and bobbin-case spring for bobbin thread. These ensure that an equal amount of thread flows from the needle and bobbin at the same time. As a result, you will have a symmetrical stitch.
Meet Your Tension Tools
The exact amount of thread must flow from the spool and the bobbin at the same time. This technique will make a row of stitches that looks the same on both sides of the fabric.
Threads are tensioned using a variety of devices:
- Thread guides
- Tension discs
- Tension regulator
- Bobbin-case spring for the bobbin thread
When topstitching, satin-stitching, or embroidering, specific machines have a small hole in the bobbin-case finger. It’s where you can feed the bobbin thread to increase the tension for better stitch definition without affecting your tension settings.
The tension assembly has the tension discs and the tension regulator. The tension discs squeeze the sewing thread as it passes between them. The tension regulator regulates how much pressure will apply to the discs.
There are only two tension discs on older machines, which regulate the screw or knob. In recent models, a dial or keypad on the front of the machine controls three discs that can handle two threads at once.
In either instance, the tension regulator is simple: turning the dial to a higher number (clockwise) causes the discs to move closer together, raising the pressure. The discs move apart as the dial is turned to a lower number (counterclockwise), lowering the pressure.
However, if you have a modern machine that makes automatic upper-tension changes, you should use a different method. Using a larger thread without resetting the dial will increase the pressure and cause the upper thread flow. Because the bobbin tension does not adjust itself, the lower tension may need to be manually adjusted to correspond.
Furthermore, each thread guide adds to the tension created by the discs. It does this by exerting a tiny amount of resistance on the thread. Bottom line: Before stitching, double-check that all guides are threaded.
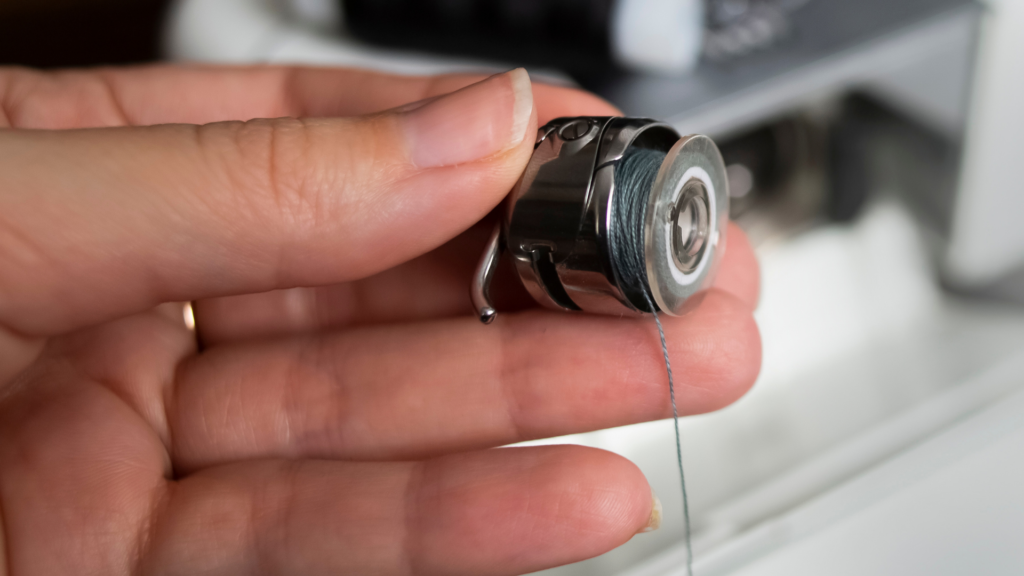
As the thread emerges from the bobbin case, the flat bobbin-case spring applies pressure on it. A tiny screw at the back of the spring controls the amount of pressure.
When the machine has a separate bobbin casing, both the spring and the screw are easy to find. Locating the tension screw on a machine with a drop-in bobbin with a built-in bobbin container can be more difficult.
To raise the resistance, spin the screw clockwise or counterclockwise with a bit of screwdriver in each case. Between testing, turn the screw in modest increments, never more than a quarter-turn. This keeps track of how much you’re adjusting your settings and lowers the chances of losing this tiny screw.
When you run thicker threads under the bobbin spring, the amount of pressure will increase. Many sewers have two bobbin cases: one for ordinary sewing and the other for adjusting to less commonly used threads. This makes it possible to skip the need to mess with the bobbin-case screw.
Recognizing Balanced Tensions
The stitched line appears excellent on both sides of the fabric when the tensions are balanced. The seam is at its most vigorous and most elastic.
Looking for apparent knots or loops at the end of each stitch is the most straightforward approach to discover imbalanced tension. The bobbin thread is too loose, or the needle tension is too tight when the bobbin thread shows on the right side.
The needle tension is too slack, or the bobbin thread is too tight when the needle thread shows on the wrong side. Because the cloth is thin, both threads may show on both sides when the tension is balanced.
Even if tensions are balanced, they may need to be adjusted. The seam may break or pucker when tensions are excessively tight. If they are too loose, the seam will gap, revealing the threads between the portions.
Don’t Touch That Dial
Because there are so several factors that might influence tension, it’s a good idea to go over the following checklist in the order listed before reaching for the tension regulator:
Dirty Machine
Lint and thread end lodged between the tension discs, under the throat plate, or around the bobbin case. The bobbin hinders thread flow by increasing resistance. Using a lightweight, lint-free cloth, “floss” between the tension discs and inspect the bobbin region for thread ends and lint.
Damaged Machine Parts
Here are some reasons that may cause problems:
- Tension discs
- Take-up lever
- Throat plate
- Presser’s foot
- Damaged surfaces on the needle eyes
- Bobbin case
- Bobbin region
- Bent needles and bobbins
- Thread guides
If you drop a metal bobbin, throw it away even if it appears to be in good condition. Minor damage might cause tension and may cause distortions.
Before removing the bobbin, cut the thread near to the case to avoid damaging the bobbin-tension spring. Before withdrawing the thread from the upper tension, raise the presser foot.
Incorrectly Threaded Machine
More “tension” issues come from incorrect threading than from any other aspect. Have you used all of the thread guides? Did you use the presser foot to restrict the thread from slipping completely between the tension discs? Is the thread freely unwinding from the spool, or is it snagging on the spool’s slash?
Incorrectly Filled Bobbin
Before winding on a new thread, remove any thread from the bobbin. Follow the machine’s instructions to wind the bobbin uniformly and at the proper tension.
Remove any thread from the bobbin’s exterior. Keep polyester and nylon threads from stretching by winding at a regular, slow, or medium speed; they relax in your seam, generating puckers.
Needles, Threads, And Fabrics
Different thread sizes and types can throw off basic tension settings on top and in the bobbin. The hole size adds to or lessens the total top tension. As a result, the needle too large or too small for the thread will also unbalance your stitches.
Before you reach for the tension settings, consider switching to a straight-stitch foot and needle plate. Remember to shorten the stitch length to 1.75 mm (15 sts/in.) on organza, chiffon, jersey, lace, or blouse-weight silks or polyesters.
Conclusion
This guide should help you achieve the best tension for your quilting project. If the tension on your sewing machine still isn’t right, it’s time to take it to a professional. Sewing machines are just like cars that require regular maintenance and tune-ups. Before you leave, double-check everything and try stitching with a different sort of cloth.


