Last Updated on September 13, 2021
You will need to set up your sewing machine before you can make your first stitch. While the basic setup of a sewing machine may appear daunting at first, it will become your second nature after a few sewing projects.
How do you thread a Singer sewing machine bobbin? There are three main stages to thread a Singer sewing machine bobbin:
- Threading the upper thread system
- Needling with the bobbin thread
- Pulling the bobbin thread up
There are two types of system: front-loading and top-loading. The method for threading a bobbin may vary on what system you have. In today’s post, I’ll go over all of these options!
Inserting A Singer Sewing Machine Bobbin: Front-Loading System And Top-Loading System
You should first understand what’s the difference between front load and top load bobbins. Doing so will help you further understand how to use your sewing machine and diagnose bobbin problems.
There are two types of bobbin mechanisms: top-loading (or drop-in) bobbin and front-loading bobbin. Some users say that it is easier to use the top-loading system. However, this will entirely depend on personal experience.
The bobbin is put into a bobbin case within the sewing machine in both methods. The bobbin casing stays inside the machine in top-loading machines. However, you must remove it in front-loading machines to insert or remove the bobbin.
The shuttle pulls the top thread around the bobbin case in both types. This method picks up the bobbin thread and brings it up through the needle plate to twist up in the fabric. The stitch is the end product of this process.
Top-loading sewing machines have a rotary shuttle hook, which means the shuttle continuously spins in the same direction. In this system, the bobbin is in a horizontal position.
An oscillating shuttle hook is found on most (but not all) front-loading sewing machines. It causes the shuttle to travel back and forth to carry the top thread around the bobbin case. In this case, the bobbin is in a vertical position.
Neither bobbin system is inherently superior or worse to the other. Some argue that one type is more ideal than the other. However, I believe it is more dependent on the overall quality of the sewing machine and the user’s experience.
Top-loading bobbins, also known as drop-in bobbins, are easier to load and ideal for novices. If the bobbin cover on the machine is transparent, you can see how much bobbin thread is left and avoid running out in the middle of a crucial stitching part.
The advantage of front-loading bobbins is an easy adjustment. Although all sewing machines have a thread tension control on the top, many sewists are unaware that they can adjust the bobbin tension. It is much easier with front-loading bobbins since you can adjust the tension with a small screw.
However, if you don’t know what you’re doing, never touch it. It is more difficult to alter than top thread tension. It’s also challenging to recover the default setting after changes.
Steps on How to Thread A Front-Loading Bobbin System
- Determine how to get to the loading area, which is an accessory compartment that you must remove. It releases the free arm and reveals a little hinged cover that unfolds to reveal the bobbin.
- To get to the bobbin case, open the cover.
- Lift the metal clasp in the bobbin case’s middle so that you may grab it and pull the bobbin case out.
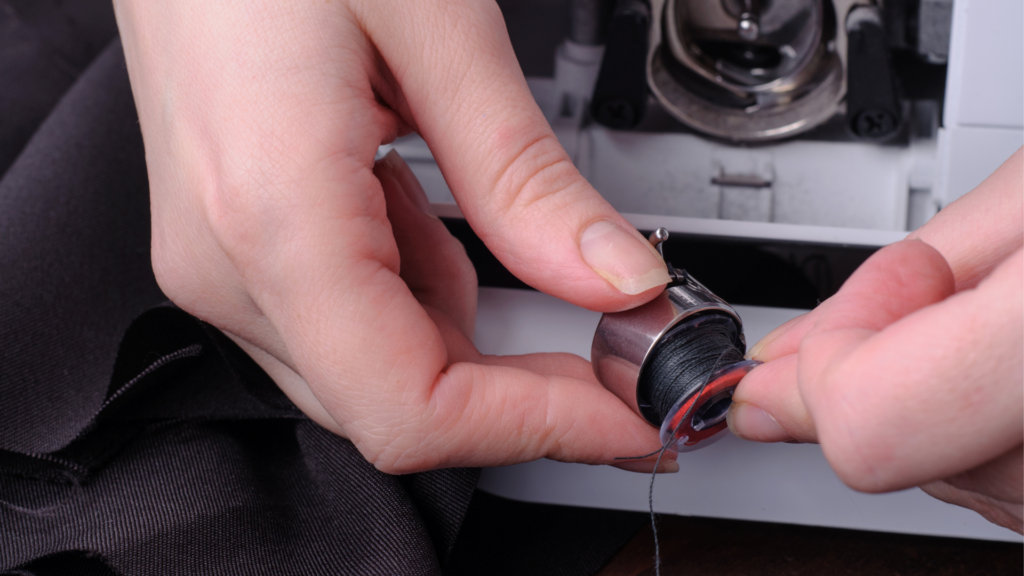
- Invert the bobbin casing, and the bobbins will fall out. Pull it out of the case to entirely remove the thread’s tail.
- Hold the newly wound bobbin so that the thread falls off clockwise to the left.
- Place the bobbin inside the bobbin case. Make sure that the thread is still clockwise.
- Pull the thread gently through the slot at the bobbin case’s edge.
- Pull the thread gently under the flat “finger” until it slips out into the case’s side aperture. At the end of the finger, two miniature “teeth” reach around the edge and into the aperture. Make sure the thread passes past the teeth. When this happens, you’ll hear a slight “click.”
- With the hinged latch facing you, hold the bobbin casing. You can use your finger to keep the bobbin from falling out.
- With that long “finger” pointing upwards, place the bobbin casing within the shuttle aperture.
- Push the bobbin casing into place, twisting it slightly if needed until it snaps into place.
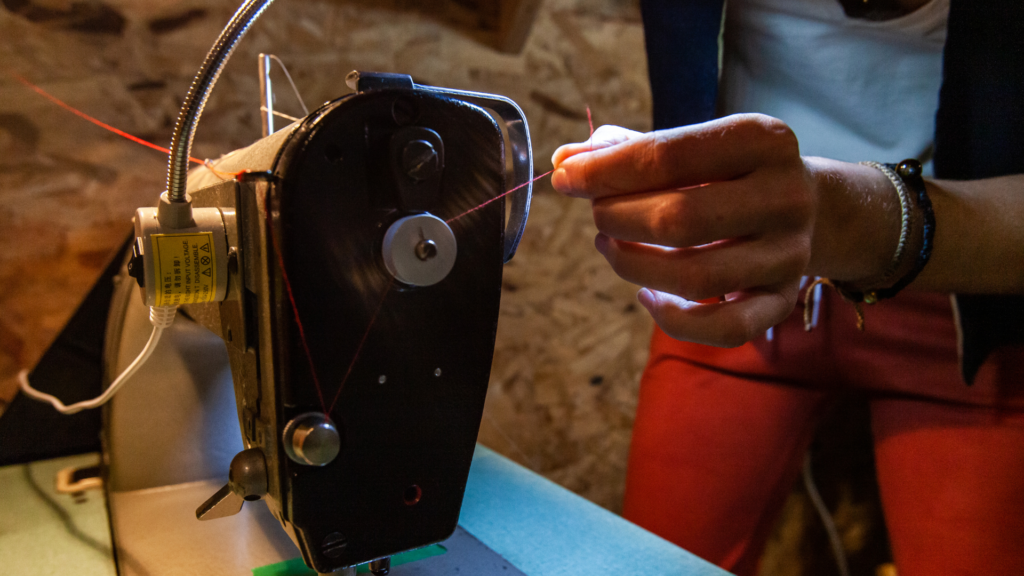
- Pull up the bobbin thread and thread the top of the sewing machine.
- Hold the top thread to the left and lower the needle by moving the handwheel with your left hand. The shuttle will begin to move around the bobbin casing.
- As you elevate the needle, you’ll notice how the top thread is pushed from right to left over the bobbin casing.
- Pull the top thread up through the aperture of the presser foot. This step draws the bobbin thread up from under the needle plate. Do this while holding the top thread against the needle with your right index finger.
- Both threads should have a pull motion under the presser foot, through the aperture, and back to the left.
- If you had to remove the accessory compartment, close the cover to the bobbin loading area and reattach it.
Steps on How to Thread A Top-Loading System
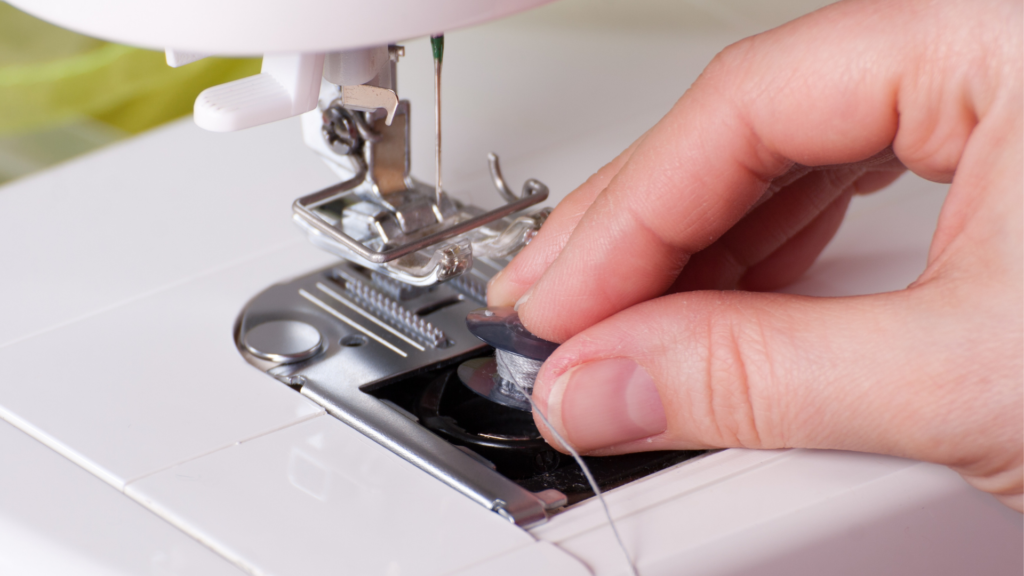
- To release the bobbin cover, press the button or lever. You must move it to the right.
- Remove the bobbin cover from the machine. You can now see the built-in bobbin.
- Hold the bobbin so that the thread exits to the right and towards you.
- Place the bobbin inside the area (the bobbin case). Push the bobbin in place with your left index finger. Your right hand should pull the thread to the left. The metal bobbin case will most likely have two slots on the side. You must make the thread exit the first and re-enter the second.
- With your left hand, pull the thread towards the back of the machine.
- Put the bobbin cover back in place with your right hand while holding the bobbin thread in place with your left. The thread should emerge from the gap between the bobbin cover and the needle plate.
- Thread the sewing machine if you haven’t already.
- With your left hand, hold the top thread while carefully lowering the needle by twisting the handwheel. Then, using the handwheel, lift the needle once again.
- The bobbin thread, which you can see wrapped in the top thread under the needle, will have been pushed up by the top thread at this point. With your right index finger, gently draw the top thread up through the opening at the front of the presser foot. Do this while holding it against the needle. The bobbin thread must have a pull motion up through the needle plate aperture.
- Pull both threads back under the presser foot, through the opening, and towards the back left with your left hand.
That might have seemed complicated, but it’s not. Once you know how to do this on your machine, it’ll take you no more than two minutes to do.
How To Fix Bobbin Thread Malfunctions
One of the most typical sewing machine difficulties is a nest of loopy, tangled bobbin thread on the underbelly of your machine. All of these may swiftly derail any project you’re working on. But don’t be alarmed––this issue is generally often simple to resolve.
Most people assume it’s a bobbin problem with their sewing machine, but it’s often nothing to do with the bobbin. You don’t even need to call a repair person to solve it. The bobbin is not to blame if a thread is wound evenly and smoothly on it.
The top threading of the sewing machine is frequently the source of the looping bobbin thread. The following are the steps to troubleshoot the problem:
Thread the Machine Properly
Rethread the sewing machine’s upper section and double-check that the thread passes through all of the thread guides to the needle. The best guide to threading your sewing machine is the manual that came with it.
Thread the machine using the presser foot up at all times. The thread can sit adequately as long as the presser foot is up.
When you press the presser foot down, the tension is engaged, and the thread will not sit properly. When the thread is not seated in the tension disks, it will not engage any tension on the thread. Thus, stitch malfunctions.
Change The Needle
Change the sewing machine needle if the looping bobbin thread persists. Make sure you’re using the right needle for your machine, the fabric you’re sewing, and the job you’re working on.
Is it possible that you bent the needle? The needle is a very fragile element that is part of the top threading. Always remember to delegate the work to the feed dogs.
You risk bending the sewing machine needle if you pull the cloth to the back of the machine. It can lead to a variety of stitching issues.
Check The Bobbin
In some cases, the bobbin can be the reason if you have not threaded it correctly. If so, it may be the source of the problem.
You can tell if you have not made the proper threading if it is not smooth, uneven, knotted, or excessively loose on the bobbin. You can avoid this danger by learning how to wind a bobbin.
Another thing to look for is whether you place the bobbin correctly into the bobbin case. Your sewing machine manual is the best one to read to determine how to insert the bobbin case. You can acquire free sewing machine manuals or replacement instructions online if you do not have the handbook for your sewing machine.
A removable bobbin case is where you will put the bobbin. The purpose of this is to thread correctly and form an upside-down “V” shape. But this only happens if your machine employs a case instead of the newer drop-in bobbins. The thread is then threaded under the metal and out the bobbin case’s side.
Clean The Machine
Is it still not working? When did you last clean the machine? Are there lint and thread wads hidden beneath or around the bobbin case? Have you noticed that your upper thread is shredding and maybe leaving bits in the threading path?
It’s time to clear out the lint. You can oil the machine and perform any other routine maintenance tasks specified in the manual for your sewing machine.
Conclusion
Sewing machines can be overwhelming at times. Yet, when you take the time to learn how to use them, you will save yourself from frustration. After learning the steps, threading a bobbin will be a piece of cake.
Happy sewing!