Last Updated on September 14, 2021
Built-in sewing machine needle threaders have a love-hate relationship with people. When they work, we adore them; when they don’t, we despise them. But sewing life doesn’t have to be all that bad, thanks to the invention of tools.
Both beginners and professional sewers might find threading a needle to be a pain in the neck. In this situation, a needle threader can help you save time and energy. A needle threader is a tool that allows sewers to thread through the needle’s eye. It is a straightforward and low-cost device that is easy to operate even for beginners.
Needle threaders are available in most craft stores’ sewing sections, and they frequently come with a packet of sewing needles. If you’ve been placing your needle threader in the bottom of your sewing box, read this article as I will be explaining the proper way to use a needle threader.
How To Use A Needle Threader
It only takes a few steps to use a needle threader, and it will forever change the way you think about hand sewing. You may be straining at the eye and still squinting at the eye of a needle. It’s time to think about the fancy little widget that came with the last package of needles you bought.
It’s a needle threader! Despite its small size and unusual appearance, it’s an effective technique to thread a needle with which you’re having trouble getting along!
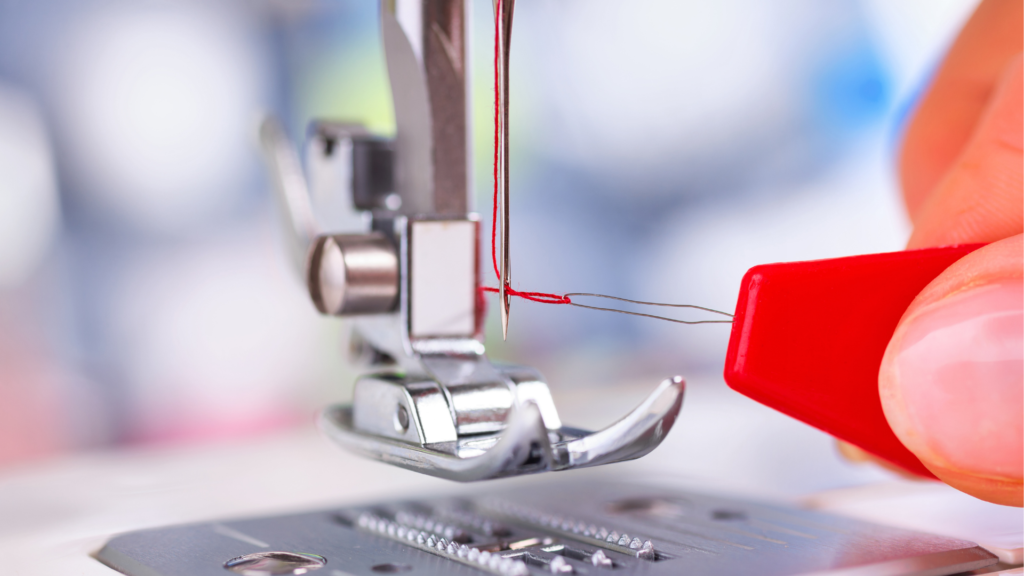
Insert Wire
- Thread the needle threader’s diamond-shaped wire loop through the needle’s eye.
- Because of the diamond form and the flexible wire it is constructed of, it should smash through.
Thread Wire
- In one hand, hold the needle threader and the needle. It’s a little fiddly at first, but you’ll be able to keep control with practice.
- Thread your thread through the needle threader’s wire loop. Pull the thread through until two tails hang from the wire threader.
Pull
- Reverse the threader wire through the needle’s eye. The threads will follow the diamond-shaped wire through to the other side as it squashes back down.
Knot The End
- Pick up one of the threads and pull it through the needle’s eye. You want to end up with only one thread passing through the eye.
- Pull the threads together to produce an even length of thread. Knot at the bottom if you wish to stitch using a double thread.
- Pull one of the threads higher than the other and knot the longer one for a single thread.
Make a selection based on the strength and thickness of your cotton if you’re unsure whether to use a double or single thread. If the thread is thin, double it. If the thread is thicker or embroidery thread, thread and knot it as a single strand.
What Is A Needle Threader?
A needle threader is a low-tech device that allows you to thread a needle eye without a magnifying glass. Now that’ll help you lessen the frustration from sewing problems.
The needle threader is a small gleaming device with a diamond-shaped wire part and a coin-shaped metal section. The wire part protrudes from the metal part you are holding, and the wire part will be placed into the needle.
You can also get ones with plastic heads that are slightly more robust. However, they all do the same thing: get the thread through the needle’s eye.
When you buy needles, they usually come with a needle threader. It makes threading a needle a breeze if you follow these simple instructions.
Depending on the needle and its intended purpose in the sewing world, the eye of the needle comes in various sizes. You might be wondering if a needle threader is necessary. The answer is a resounding YES! Without learning how to use a needle threader, a fine needle with a fine eye might be nearly impossible to thread!
Reasons Why An Automatic Needle Threader Stops Working
1. You Are Not Using The Correct Needle
Certain textiles necessitate the use of specific needles. A ballpoint needle, for example, is better for knitting cloth than a sharp needle since it won’t snag and cause the fabric to run.
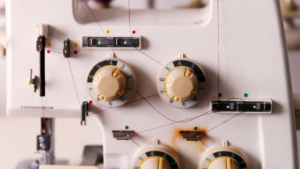
On the other hand, your automatic needle threader isn’t designed to thread all types of needles. It works best with regular needles from size 11 to size 16. With a smaller needle or a twin needle, your automatic needle threader will not work.
2. Your Sewing Needle Is Not In Its Highest Position
For your automated needle threader to work, your needle must be in the highest position. Also, your presser foot must be lowered out of the way.
Turn your handwheel in the direction of your body until your needle is at its highest point. Some sewing machines have a button that will automatically lift the needle for you.
3. Your Needle Is Damaged, Bent, Or Dull
Stitching machine needles can become damaged or bent over time, especially when sewing through a heavy cloth. Natural defects or burs in sewing machine needles occur during production.
Before you insert a needle into your machine, you may come across one bent or damaged. It isn’t often, but it does happen from time to time.
Your automatic needle threader hook will not line up correctly if your needle is damaged. Replace the needle with a new one. It’s a good idea to keep replacement sewing machine needles on hand at all times.
4. Your Sewing Machine Is Not Threaded Correctly
Even those sewing for a long time can make a mistake when threading their sewing machine. If your automatic needle threader isn’t working, the first thing you need to do is check this.
There will be instances where your thread does not line up through the guide above your needle. It means that the hook on your automatic needle threader will not be able to capture it.
5. Your Thread Is Too Thick
The small hook can’t grab certain types of thread on your automatic needle threader. If you’re using ornamental thread, metallic thread, or fine nylon thread, you’ll have to thread the eye of your needle manually. Furthermore, any thread with a thickness of 130/120 or greater is incompatible with your automatic needle threader.
6. Your Thread Hook Is Dull Or Bent
Your automatic needle threader’s small hook, which grips your thread and pulls it through the eye of your needle, can bend. You may sometimes line it up with your fingernail to get it to go where it’s intended to go. When the hook becomes dull, you’ll need to replace it eventually, but this will take a long time.
7. Your Needle Is Not Inserted Correctly
As you sew, a tiny screw keeps your needle in position. The screw can loosen with time, causing your needle to fall out a little. You could also loosen the screw by bumping it.
Your needle will not line up with your automatic needle threader if it is not fully inserted. Make sure the needle on your sewing machine is fully extended, then tighten the screw as much as possible.
Also, make sure your sewing machine’s needle is not inserted backward. Your needle’s upper shank is rounded with one flat side.
When you install it, the flat side should face the back of your sewing machine. If you insert your needle incorrectly, it may shatter when it hits the bobbin case or throat plate.
8. Your Automatic Needle Threader Spring Is Missing or Broken
Your automated needle threader‘s spring is fragile and easily breaks. Your spring is missing or broken if you pull down on your threader, and it does not rise back up on its own.
Replace your automated needle threader spring yourself or get it replaced by a professional. It is a low-cost component.
Tips When Using A Needle Threader
A needle threader that has been bent will never work again. Before you can practice using it properly, it will need to be adjusted or replaced.
Cycle The Needle Up And Down One Time
Before using the needle threader, make sure the needle is at the highest position. It’s as simple as pressing the needle up / needle down button twice on a computerized sewing machine.
Allow the machine to raise the needle to the highest point. You can accomplish this by turning the handwheel until the needle reaches the end of its cycle on mechanical machines.
The Order Matters
BEFORE the thread is directed into the needle threader, the little metal hook on the needle threader must entirely travel through the eye of the needle. The thread is frequently not caught if introduced into the needle threader before the hook has passed through the eye. To thread a needle successfully, you must follow the steps in the correct order.
Let It Go
The thread not pulling out of the hand holding the thread end is a chronic problem with new users. The needle threader will be unable to pull the thread through the needle eye if the thread is held too tightly. Consider using a slight touch. A little resistance is beneficial, but clinging to the thread for dear life is not.
Lower The Presser Foot
The presser foot can be lowered for two reasons. To begin with, it will provide more room for your fingers to operate the needle threader.
Second, lowering the presser foot engages the top tension, preventing the thread from pulling too quickly through the machine. The additional resistance provided by the tension will aid in keeping the thread constant as it is guided into the needle threader.
Lift The Thread Up (Not Back)
Rather than pressing the thread toward the machine’s rear, gently lift it. The needle threader’s hook will snag the thread before drawing it through the needle’s eye because of the up angle.
Check The Needle Height
A needle threader can help assess whether a needle was raised high enough into the shaft when recently replaced. Loosen the needle screw and lift the needle higher if the needle threader head does not align with the needle eye.
Plan B
As a backup, having a hand-held needle threader is an excellent idea. Use it with sewing machines that don’t have a built-in needle threader, sergers, or when your onboard needle threader breaks down. It’s difficult to go back to threading the needle in an old-fashioned manner after you’ve gotten reliant on a needle threader.
Threading Needles By Hand
- Point the end at the eye and lick it. However, wetting your floss can rust out your needle eyes, making the floss shred and get more knots. You can also use a thread lubricant like Thread Magic or beeswax to lubricate the floss.
- Fold the floss in half and place it over the eye or shaft of the needle, then push the needle’s eye over the folded floss. Combine the end of your floss before threading if you’re starting with the loop method. If this isn’t possible, keep the tail short and draw through the eye.
Other Needle Threading Tips
- Put white behind the needle’s eye to make it easier to view the eye.
- If you’re going to thread by hand right into the eye, use sharp scissors to snip a tidy end. Cut the thread at an angle that will help the thread tip become “pointed.” It should make it easier to pass through the eye.
- Make sure the needle is pointing in the appropriate direction. Most sewing needles have a “groove” on the side of the eye, sometimes only on one side; this is the side from which you should thread the needle.
- Use a magnifier or magnifying light if you have trouble seeing the eye of the needle.
Conclusion
Learning to use a needle threader makes it easier for you to thread even the smallest needle-eye there is.
This sewing tool will save you plenty of time and allow you to focus more on your project.
Happy sewing!

